It has been a beautiful spring here in Pennsylvania – albeit very dry. We usually skip from winter almost directly into the dry summer weather but this year we have had a stretch of beautifully warm days bookended by cooler eves. We are in desperate need of rain however and we are all hoping that we do not repeat the parched summer of last year. The only side benefit to the lack of rain is the ability to be outdoors constantly. We are so very fortunate to live on a river that affords us the glorious opportunity to have our morning coffee as well as our early evening cocktails on the dock (and I thank my lucky stars every single morning!)

A Summer State of Mind
Aside from our coffee and cocktails, the grill has been fired up constantly. One of my goals this year is to perfect my ‘pizzaiola‘ (pizza maker) skills….and for good reason. We love a good project around here and we are deep in the planning stages for an outdoor pizza oven 🍕. Jay has spent years researching and sketching, measuring, and drawing, and after many (and boy do I mean many) years of “discussion” on the best location, we finally have the spot picked out! Jay has also been collecting stones for years in anticipation of building a pizza oven. We still need to secure the approvals but when it gets built, I will be “at the ready” with my pizza peel and ball of dough in hand! (And you will all be invited over for pizza and fire-roasted veggies and bread and…woohoo! 🥳)
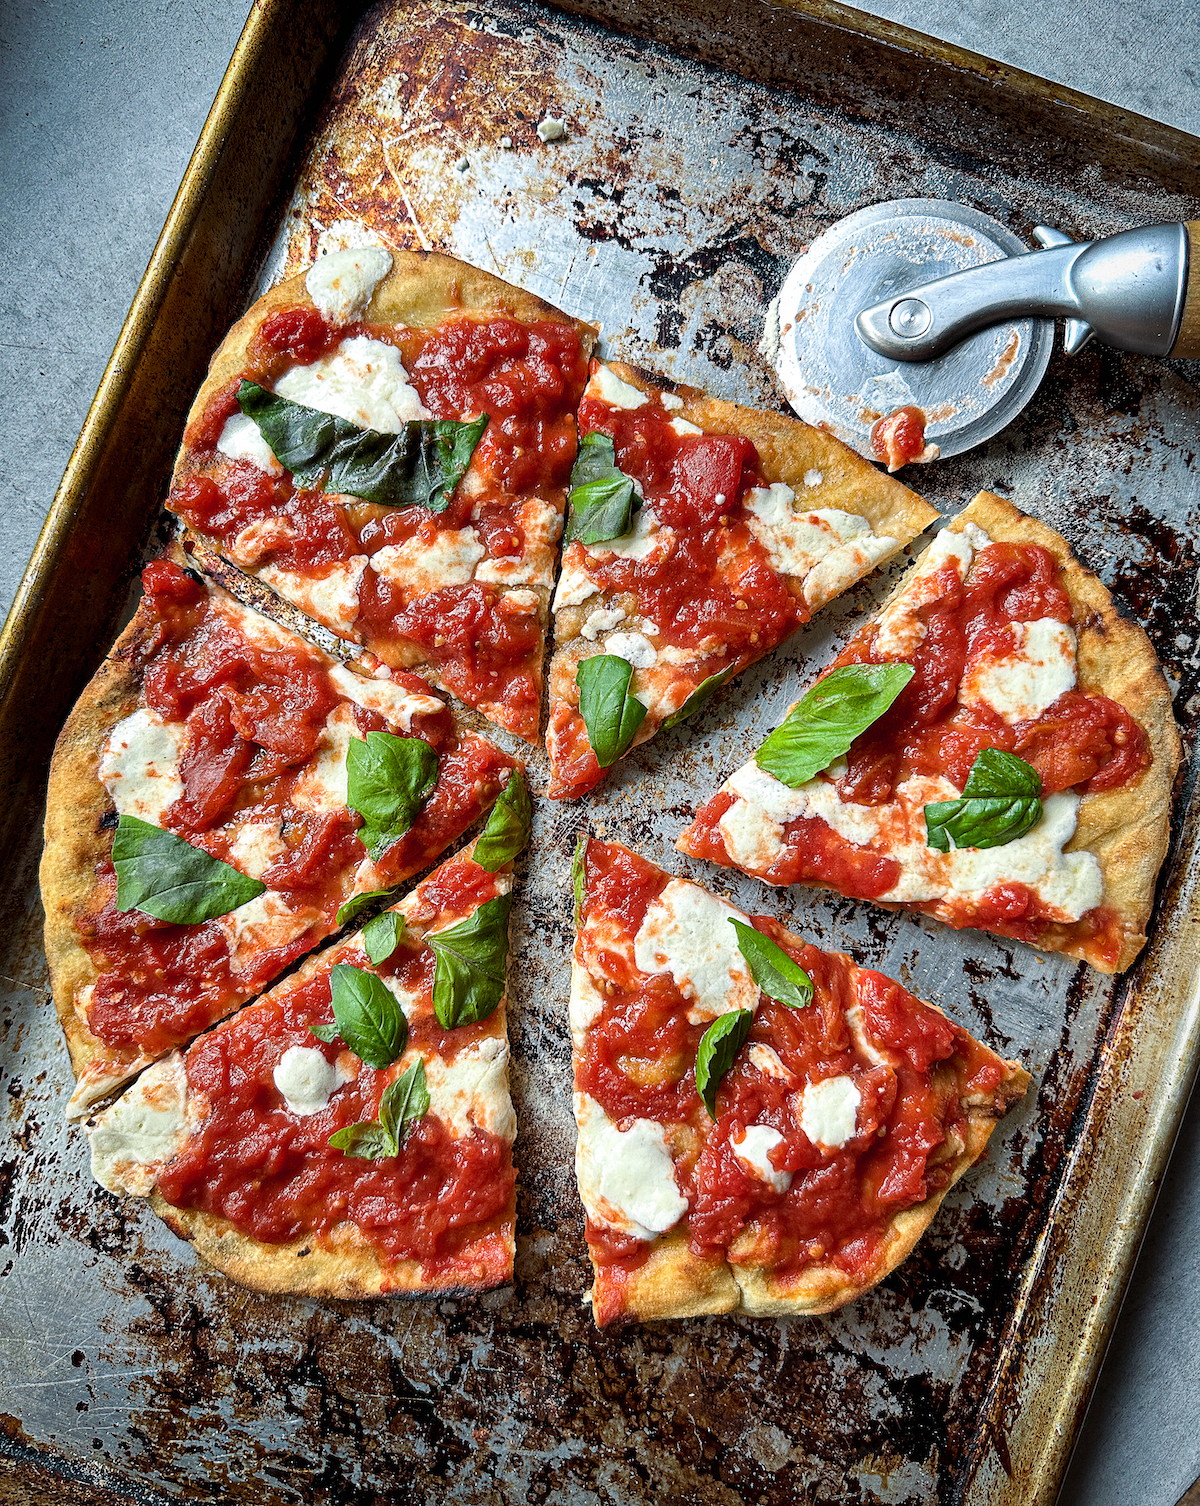
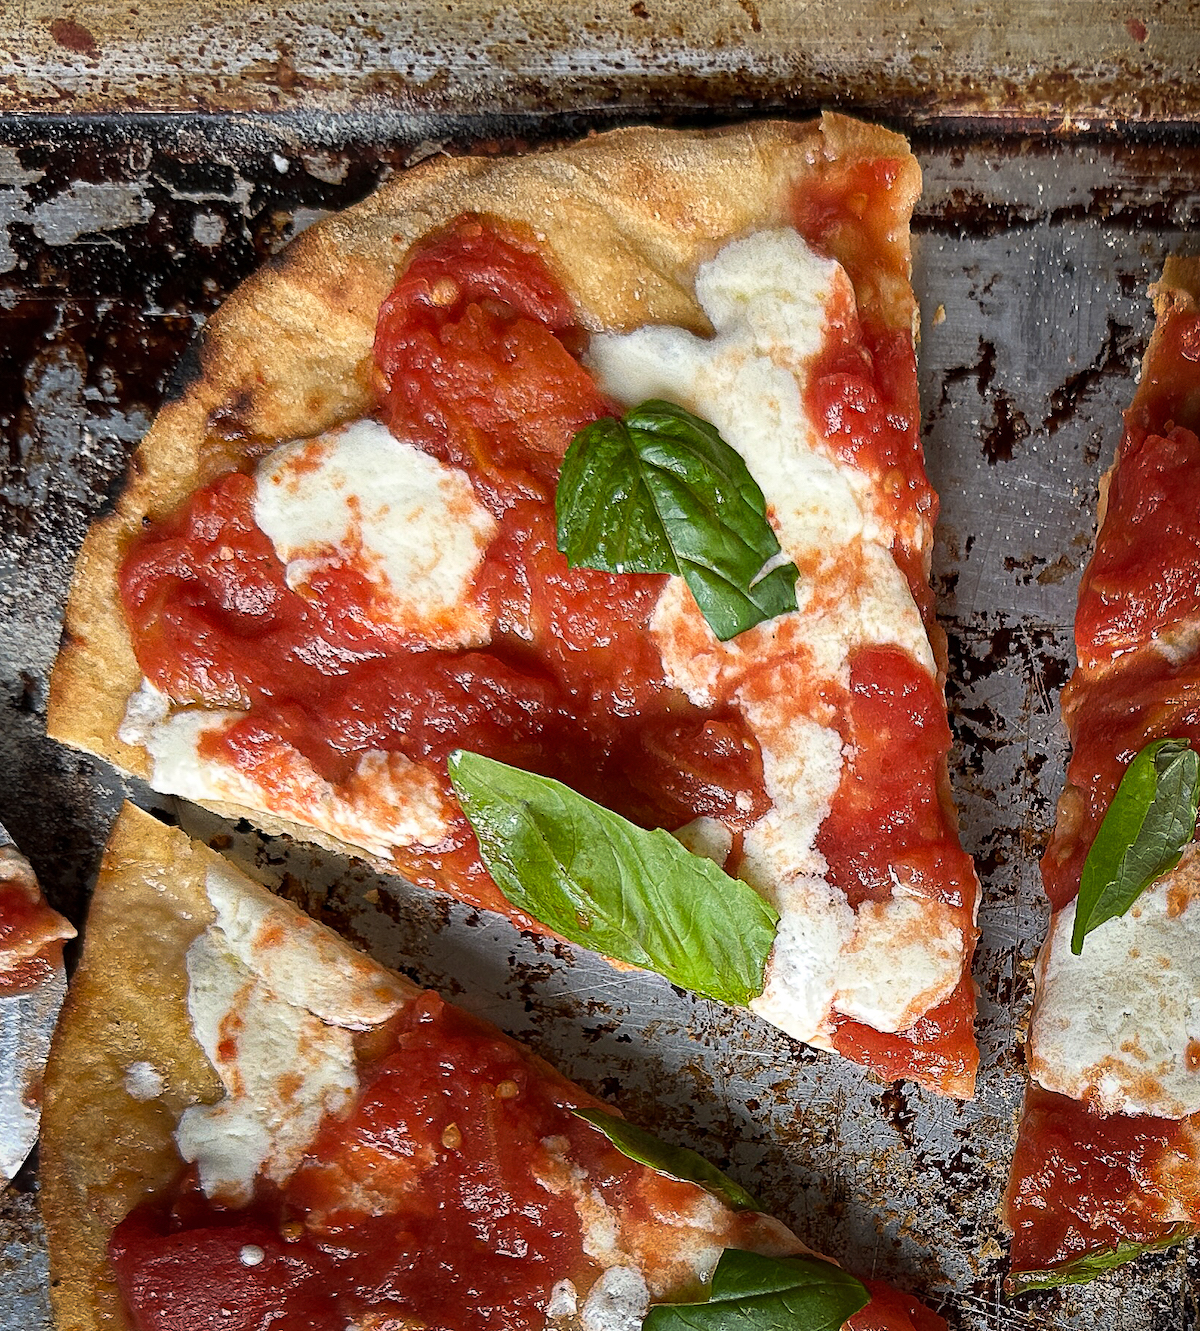
A few friends recently mentioned that they had eaten grilled pizza. I used to make grilled pizza all the time but realized that it had been a while since I had made it. Pizza is one of the easiest and most fun things to grill – and it lets me continue to hone my pizza dough recipe over the summer. We tend to be pizza ‘purists’ around our house – a crispy, thin-crust pizza Margherita is our pizza nirvana. No fancy toppings – just that beautiful crispy crust spread with a layer of fresh tomato sauce, mingled with creamy mozzarella and a few fresh basil leaves tossed on when the pizza is fresh off the grill. That is heaven on a plate for us.
I have been playing around with dough recipes – and am currently using one that has been adapted slightly from King Arthur Flour. It is super simple; can be made in one bowl and can easily be kneaded by hand. It makes for a beautifully soft dough. You can prepare it in advance and pop it in the fridge. (In fact, the longer rise time makes for a more flavorful crust.) The only thing left to do is whip up the (uncooked) sauce and tear up a ball of mozzarella and fresh basil. Of course, you can add other toppings if you choose – just use a bit of restraint when topping the pie as too many toppings can make for a pretty soggy pizza. (I have also been going down a bit of a pizza rabbit hole by working my way through Dan Richer and Katie Parla’s The Joy of Pizza. Wow, it really is everything you could want to know about making pizza!)
Before we get grilling, a few tips for making pizza on the grill:
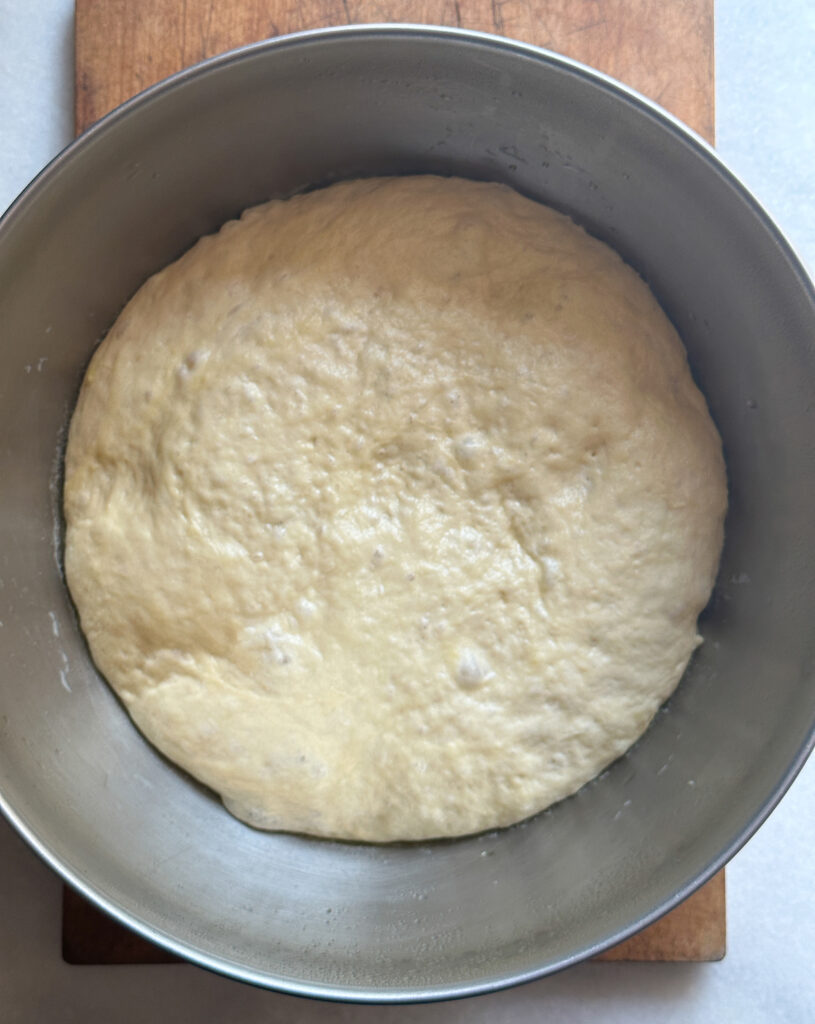
- This first tip isn’t necessarily just for pizza on the grill. You can make the dough a day in advance or the morning of your pizza fest; allow it to rise for about 45 minutes at room temperature; then put it in the fridge for 4 hours or up to 24. This allows for maximum flexibility with your schedule. And the longer rise time will help develop the crust’s flavor.
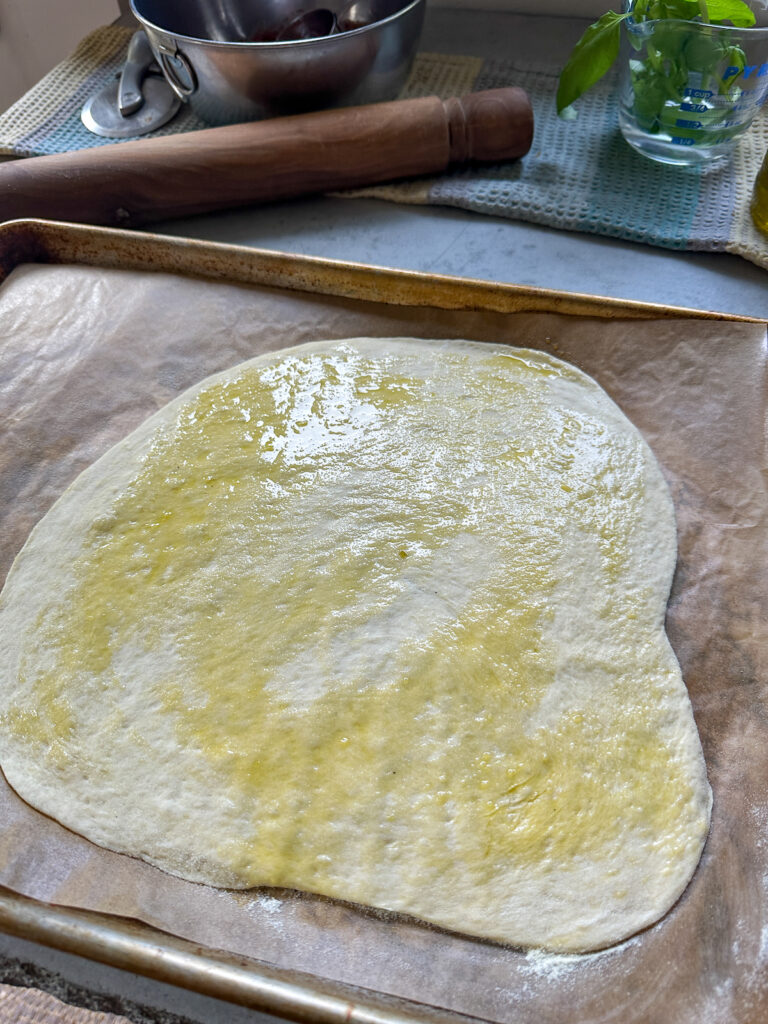
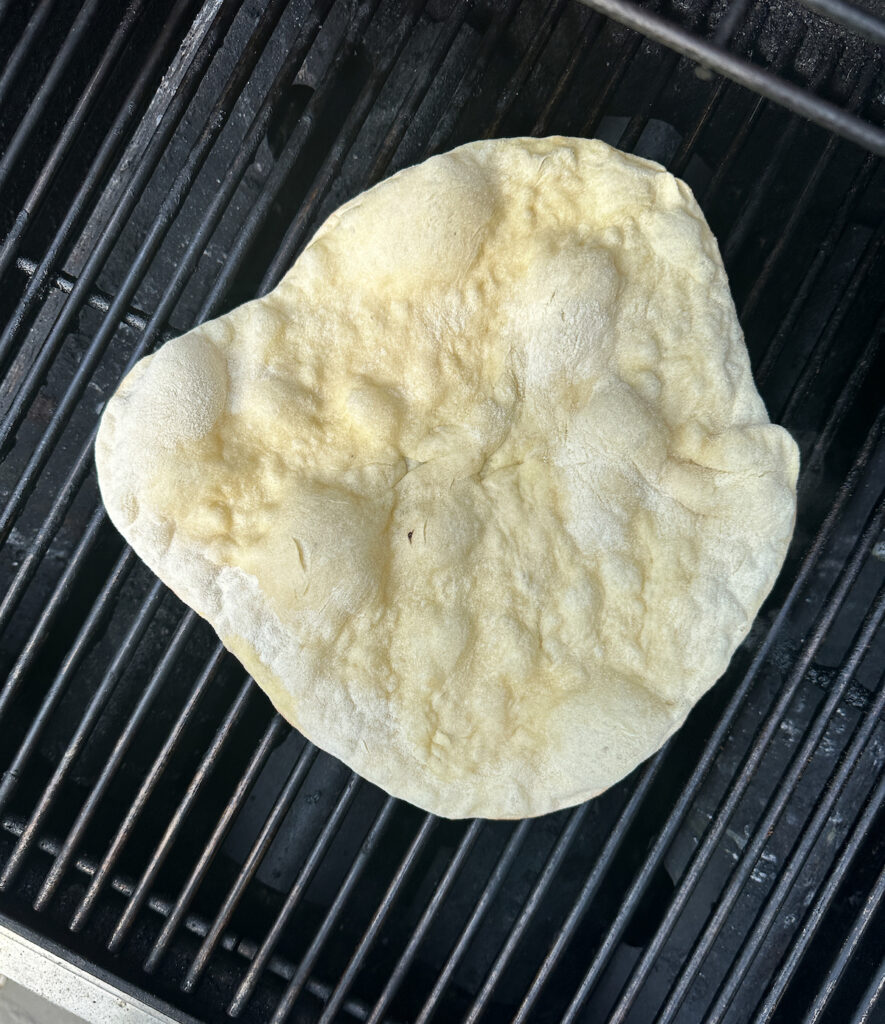
- The grill delivers surface heat on the underside which crisps up the crust nicely. However, given there is no top-down heat, be sure to keep the pizza lid down to help warm the toppings. It is also a good idea to stretch or roll the down very thin without a raised edge, so it won’t have a doughy texture.
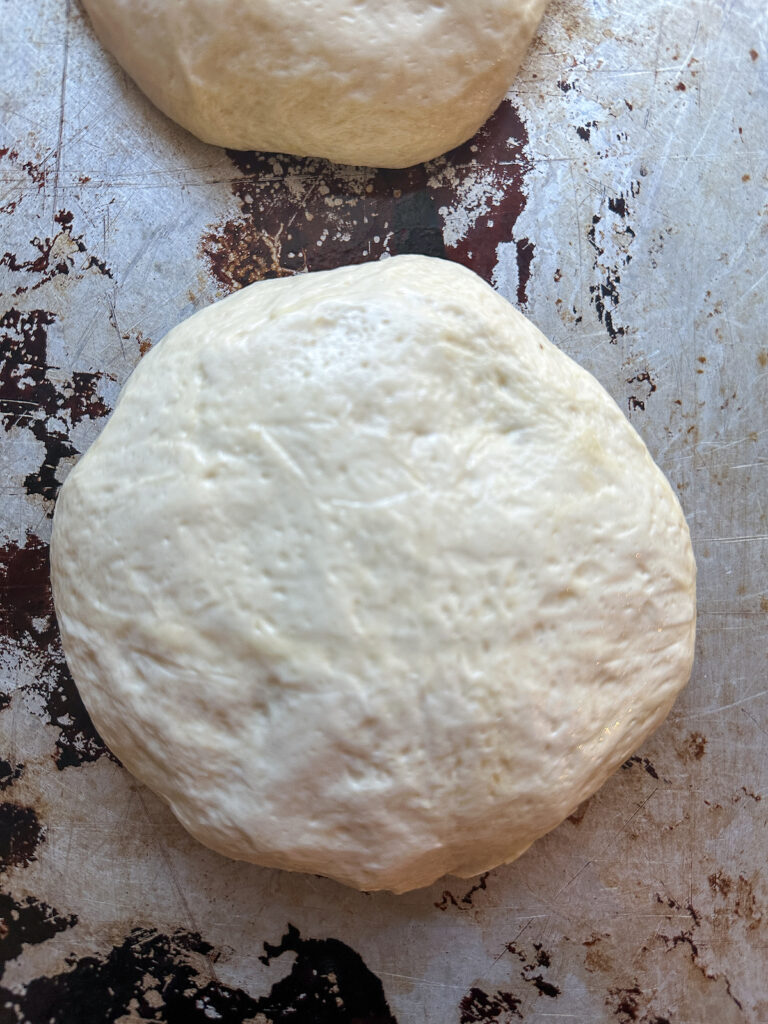
- I find smaller dough balls work best. You can stretch the dough by hand but make it easier on yourself and use a rolling pin to achieve a nice thin crust. Do this on a pizza peel or parchment paper, dusted with cornmeal or semolina flour. If using parchment, it is rather fun to flip your pizza onto the grill and then peel off the parchment. Makes for easy cleanup!
- When it comes to the toppings, less is more so you do not end up with a soggy pizza. Use restraint if you can! A little over ¼ cup of sauce for a 10-inch pie should be plenty!
- To cook or not to cook your sauce? There is an age-old debate about whether to use uncooked or cooked sauce on your pizza. We tried it both ways and we are going with the uncooked version. We think the tomatoes retain a bright, livelier flavor (and it is one less pan to clean up!) However, you could cook down watery tomatoes to make a thicker sauce if you’d prefer. Ditto for the basil. You could add it with the other toppings but we prefer to add the fresh basil leaves after the pizza comes off the grill.
- The garlic-olive oil basting sauce is totally optional but does add an additional depth of flavor to the crust that we love.
Now – let’s fire up that grill and make some pizza!
Buon appetito! xx
Michele ❤️
Grilled Pizza Margherita
- Yield: 3 (8 to 10 inch) pies 1x
Description
Grilling pizza is a fantastic way to get your summer pizza fix without turning on your oven. This delicious treat is so easy to make and only takes a few minutes on the grill for a crispy restaurant-worthy pie!
Ingredients
For the pizza dough: (adapted from King Arthur’s Pizza Crust recipe)
- 2 teaspoons (8g) active dry yeast or instant yeast
- Pinch of sugar
- 1 cup (225g) plus 2 tablespoons lukewarm water
- 3 cups (360g) all-purpose flour
- 2 tablespoons (25g) olive oil
- 1 ¼ teaspoons (8g) kosher salt
For the sauce:
- 1 (28-ounce) can whole peeled tomatoes, preferably San Marzano, drained
- Extra-virgin olive oil
- Kosher salt
For the basting oil (optional):
- 1/3 cup extra-virgin olive oil
- 2 cloves garlic, minced
To finish the pizza:
- Cornmeal or semolina flour
- 6 to 8 ounces fresh mozzarella, torn or cut into 1-inch pieces
- Extra-virgin olive oil
- Torn fresh basil leaves
Instructions
- Make the dough: Sprinkle the yeast along with a pinch of sugar in a large mixing bowl. Add 2 tablespoons of lukewarm water. Allow to sit for about 10 minutes until the yeast mixture is bubbly.
- Weigh (or measure) your flour and add to the bowl, along with the rest of the lukewarm water, olive oil, and salt. Mix everything together using a wooden spoon until a soft dough forms. Switch to using your hands. Knead dough for about 10 minutes, adding additional flour, if necessary, until the dough is firm. (You can use a stand mixer for this. Mix for 4 to 5 minutes on medium-low speed.) Shape the dough into a ball.
- Transfer the dough to a large lightly oiled bowl. Cover the bowl tightly with plastic wrap.
- To make the pizza immediately: Place the bowl in a warm spot to rise, about 90 minutes if using active dry yeast; about an hour if using instant yeast. To make the pizza later: Place the bowl in a warm spot to rise for 45 minutes. Place the bowl in the refrigerator and allow the dough to rise slowly for 4 hours (and up to 24 hours). The longer rise also helps develop the crust’s flavor. About 2 hours before you want to serve the pizza, remove the dough from the refrigerator.
- Prepare the sauce and basting oil (if using): In a medium bowl, crush the tomatoes with your hands (or use a food mill.) Add a drizzle of olive oil and season with salt to taste. In a small bowl, whisk together the olive oil and garlic. Set both aside.
- Finish the pizza: Divide the dough into 3 equal pieces. Form the pieces into balls by tucking the edges underneath to the center and then rub your hands around the outside of each piece until you have a nicely shaped ball. Put the balls on a lightly oiled baking sheet. Cover with lightly oiled plastic wrap and set aside to rise for at least 20 minutes and up to an hour.
- Preheat the grill to 400 degrees Fahrenheit (or a medium-hot temperature). Have all your toppings near the grill.
- Place the dough on a work surface or piece of parchment paper, dusted with cornmeal or semolina flour. Lightly dust the top of the dough. Using your hands or a rolling pin, press down on the center and gradually spread it out to an approximately 10-inch circle. Be sure the entire circle is flat (no raised rim). Brush some of the basting oil (if using) or extra-virgin olive oil on the top of the dough. If using a pizza peel, transfer the dough to the peel.
- When the grill is hot, oil the grates using a brush, or a wad of paper towels dipped in oil.
- If using a peel, slide the dough off the peel and onto the oiled grates.
- If using parchment paper, flip the dough onto the grill (parchment paper will be on top). Peel off the parchment paper and brush the top of the dough with the basting oil.
- Close the lid of the grill. Bake for 4 minutes. Lift the lid. (The dough should have big air bubbles) Using tongs, lift up the dough and check underneath to see if it is browned on the bottom. Cook longer if necessary but watch closely so it does not burn. When browned on the bottom, use a spatula or tongs, and remove the dough to a baking sheet, grilled side up. Put the lid back down on the grill.
- Spread approximately ¼ cup tomato sauce over the surface of the dough, all the way to the edges. Sprinkle about 1/3 of the torn mozzarella on top. Place the pizza back on the grill. Close the lid and cook for an additional 4 minutes. Open the lid and check if the bottom is brown and the cheese is melted. If not, close the lid and cook for another minute or so. Watch carefully.
- Remove from grill. Drizzle with extra-virgin olive oil, a sprinkle of salt, and fresh basil leaves. Serve!
The grill is a great way to make pizza, the heat is more intense than anything I can manage in my oven. And that slightly smokiness is so appealing. And like you I’m definitely in the no-cook sauce camp!
Really is a super way to make it …and glad we are in the same camp! Happy summer!